Wednesday, January 22, 2014

The Versatility of VHS Ribbon...Who Knew?

VHS tapes are obsolete, yet I have plenty of them. I donated the various titles to others, but what do I do with the multitude of tapes filled with home movies? Once they've been converted to DVD or digital files, there's really no reason to let them hang around. It doesn't feel right to toss them in the garbage. After sitting on a shelf in my studio for a few months, I finally took them apart. The plastic casing was saved for another time. I threw the spools of ribbon into a basket and promptly forgot about them. 

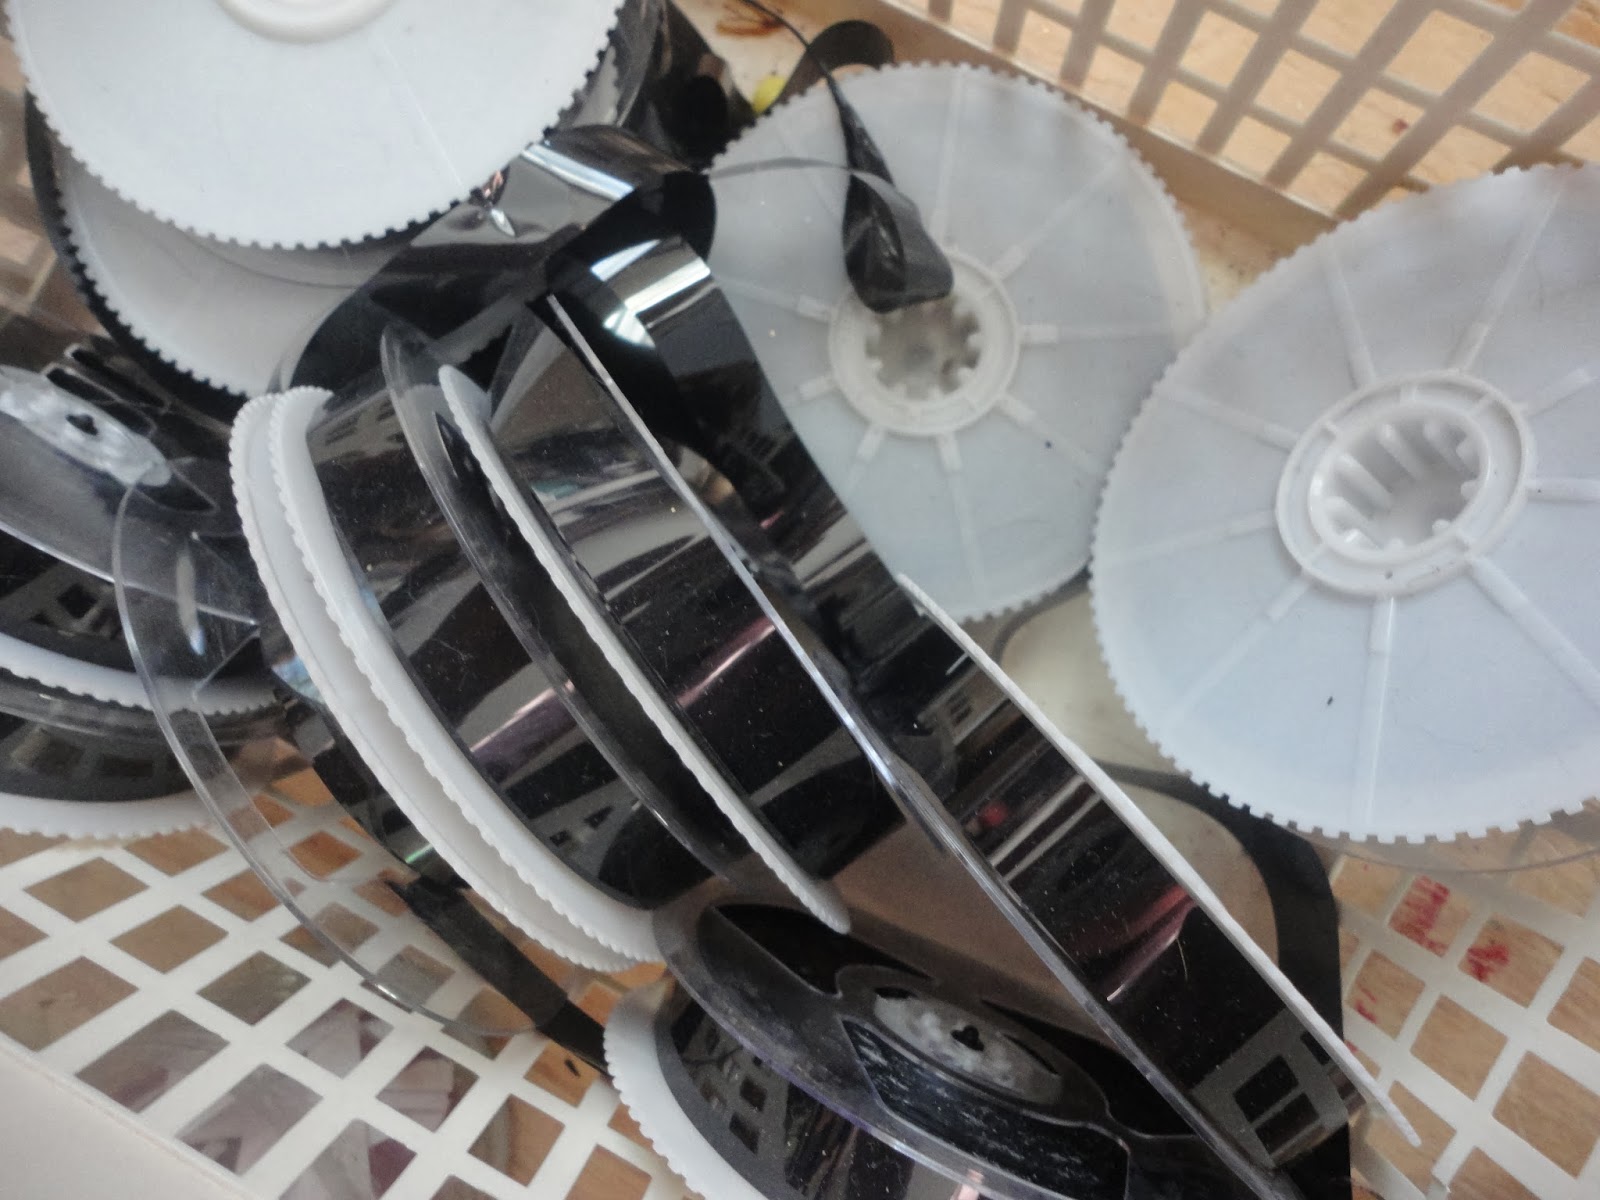
Spools of VHS ribbon

Let's talk about this ribbon for a sec. There's two spools in each tape. It's super thin and easily broken if pulled too hard. It squeaks and crinkles when worked with. There's plenty of examples of artists creating portraits out of VHS ribbon, but I do not have the patience for that. Kudos to those artists who do. You can find 'em on Pinterest, no worries.

Awhile back, I had crocheted a bag out of plastic yarn (or plarn, as the pinners would call it) that worked out really well, so I thought, VHS ribbon would work, too. Two spools and several days later I have a fairly large and surprisingly sturdy bag. It was easy to work with but very noisy. The TV was louder than usual and complaints from the family drove me into another room to work. I am still left with over ten spools of ribbon. There is A LOT of ribbon on each spool, it's never ending, I swear. 

A crocheted ribbon shoulder bag

I got it into my head that I should build a guitar. Not a real one (not yet) but one that could hang out on a wall or something. In a previous post I had created a mosaic out of my daughter's old (and broken!) 3/4 guitar, which was met with some mild resistance, so this time, I'll just build one and keep everybody happy. I used VHS ribbon to connect pieces of wire hanger to create a frame for the guitar. This held together pretty well. The ribbon broke easily if pulled to hard when knotting, resulting in frequent swearing, but it held.
Using ribbon to build a guitar body. 

I ended up with a beautiful guitar created top to bottom from materials found in the studio! It's available in my Etsy shop, https://www.etsy.com/listing/168953674/fairy-house-guitar-music-house-2013?ref=shop_home_active_20.

The finished guitar!

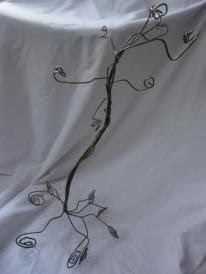
My current project involving VHS ribbon is another guitar. I'm trying to use up as much scrap paper as possible here, and I think I may achieve that goal! I created a guitar body shape using wire hangers (8 or 9, I think), and wrapping the hangers with ribbon. The center of the guitar will be filled with rolled scrap paper. I will build a neck and head the same way, and use old guitar strings to finish it off.

Ribbon wrapped hangers create a guitar shape.
Close up of the frame.


Look for update pictures of this guitar and other projects on my Facebook page  https://www.facebook.com/watercoloredwindows!

Tuesday, November 26, 2013

Set your drink down anywhere on this coaster.


I did try to clean my studio a few weeks ago, I swear. I managed to widen the path a little bit! And I threw out three--count 'em, 3!--small bags of garbage. It's just that, well, I think it multiplies and I end up with more of what I thought I had less of.

Take, for instance, ceramic tiles. I have two boxes of them. At least they are painted and sealed ceramic tiles. Last summer, I dyed them for an outdoor project. I didn't use them all, and now they've migrated back upstairs. There's about 80 tiles lurking in boxes on the floor, underneath a bag of empty plastic milk containers (don't ask), tissue paper, and what I think might be a cutting mat. Or cardboard. It could be cardboard. It's probably foam board.

Anyway, tiles. Tiles make good coasters. Sturdy, pretty, kinda fragile. I dyed a bunch yellow, mod podged some red starbursts, added dabs of hot glue for feet, and voila! Coasters!

The down side? 80 is A LOT. Nobody needs that many coasters. I stopped at 14. So, the remaining tiles were shuffled off to a new spot underneath the easel that is holding 4 paintings in progress.  Another time, tiles. Another time.

Tuesday, November 19, 2013

Twisted Trees


An artist usually has a favorite subject and I am no different. Trees, female nudes, and most recently, music, are my go to topics when I'm in the studio. These subjects feel like they relate to each other and I've been known to combine them from time to time. 

Wire hangers have become one of my favorite mediums to work with. I like the versatility--they can be twisted into just about anything or used as a frame or support. This is also a material that is easily found and free. I get boxes of wire hangers from neighbors and friends who find dry cleaning a necessity. And the only tools needed are a pair of needle nose pliers and wire cutters. 

My favorite part about working with wire hangers? I love the physicality of it. It's hard work to bend wire into shapes. There are a lot of differences in wire hangers; they are not cheap white ones from the dry cleaner. Some of them are made of pretty thick metal. 

The first wire trees I made were over two feet tall and used to display necklaces at a craft fair. I've used them to display ornaments at Christmas. I've made smaller trees, about eight inches tall. I've given them to my daughter and her friends to display their jewelry.

I also made a tree for a friend who harbored a strong dislike for a particular ornament....


.....she now fosters an intense feeling of happiness regarding said ornament, and keeps this tree in her yoga studio to inspire her and her clients. 


Tuesday, November 12, 2013

"A guitar is meant to be played!"

.....said my daughter's guitar teacher in a hollow voice. He followed that up with, "it's pretty," but I understood he did not approve of my mosaic/mixed media piece. Oh, well. Can't please everybody.

My daughter has been playing guitar for two years now. I bought her a 3/4 guitar when she started, which turned out to be damaged, and would cost me more to fix than I paid for it. The recommendation was to buy a full size guitar, as she would grow into it. So I did. But what to do with a pink, damaged, 3/4 guitar with a fairy on it? Turn it into a fairy house, of course! Since my goal in life is to use up all the stuff in my studio, this is a perfect way to do that. Perfect and painstaking.

Here's a list of materials used, because I know you're dying for a list: tiles, buttons, beads, brads without the pointy parts, the pointy parts of the brads (waste not, want not, et al.), fabric, wooden beads, glass beads, glue, and grout. I'm sure I'm missing some stuff, I went through several boxes of materials here.


 The best part? Cutting out the hole in the front and removing the strings. I've always like breaking stuff. Don't judge.
A little sawing, a little sanding,and there's a whole new space!


I eventually did make this into a fairy house. I added a ladder on the inside, and a wool floor where the wooden braces are.

I agree, guitars are meant to be played--unless they are broken, then they are meant to be turned into works of art.

Friday, November 8, 2013

The Studio: A Love/Hate Relationship

I am fortunate enough to have enough space to convert one of the bedrooms to a working studio. It's an artist's dream! This is the love part. 

This is the hate part:
I am a very messy artist. I jump from project to project, leaving destruction in my wake. No matter how many times I "clean up" in here, within 10 minutes, it looks like this again. I'm like a gaggle of unsupervised toddlers in toy store. As a result, most of what I start rarely gets finished.

Recently, life has changed dramatically for me. There may come a point when I am no longer as fortunate as I have been, and looking at this room only contributes to the clutter in my mind. The stress has been overwhelming at times. I have been trying to line up my ducks, but they are disobedient little fuckers, and refuse to snap to. I am forced to start shooting them.

Duck #1: Clear out the studio. This has been my goal all along, but it needs to move faster. I have given myself until 5pm today (it is 12:33pm EST right now) to make it happen.

Challenge accepted.

Tuesday, August 13, 2013

Painting on the Ceiling, Or, How to Permanently Pinch a Nerve in Your Neck


I have a friend who commissions me to paint murals in her house. I love accepting commissions from her because she tells me the subject and encourages me to do WHATEVER I WANT. This is the greatest blessing an artist can receive from a paying customer! 
I've done several projects in her house. Her safari loving daughter got a giant, twisting tree along a bedroom wall. Her son got a multimedia life cycle of a dragon. And each family member got their initials painted on a canvas in Celtic lettering. 
My friend is Irish. She loves Celtic circles. Naturally, she wanted one painted on her dining room ceiling. She found one she fell in love with in a book. This illustration was no bigger than the diameter of a 1/4 c measuring cup. She wanted it 4 feet in diameter on her ceiling. 

Sure, no problem. 


I spent 4 months standing on her dining room table, working on her ceiling. (Insert Sisteen Chapel joke here. there were plenty). I often had an audience. Her children run around the table trying to show me a variety of books about dinosaurs. Her father would grab a beer and make himself comfortable for a few hours. Who can blame him? Cute chick on a table? Seriously. Her two dogs tried to climb up there with me to hang out, and on one occasion, the bearded lizard attempted to leave his cage because I moved out of his line of sight! And I left the project with crick in my neck from being in the same position for so long.

To date, this is the most difficult project I've done. I enlarged the image on mural paper to the size specified; then used an Exacto knife to perforate the paper. Enlarging the image changed how the circle looked, something I hadn't planned for. The mural was taped to the ceiling, then traced with pencil. I retraced the lines after removing the paper. Then began painting. I used latex interior flat paint, which needed three coats. 

I'm sure there was an easier way to do this, but I was on a budget, and needed to make the whole thing work. In the end, my patron was happy, and her dining room does have one serious WOW factor. Oh, and that nerve unpinched itself, eventually.

Tuesday, July 9, 2013

Bookbinding for Amateurs, The Tutorial

I love books; the feel, the spicey smell, the excitement of turning the pages to find out what happens next. I've always wanted to learn to bind my own books, but realized I don't really have the patience for it. I do, however, have the patience for a bookbinding for dummies type of technique. 

Step 1: Gather some paper. I used 12x12 in scrapbook paper cut in half here, but printer paper, drawing paper, construction paper all work. Fold four sheets of paper in half and use a ruler to make a sharp crease.


Step 2: Gather a needle and some thread. Professional bookbinders have their own specific tools they use, but I don't have any money, so I used a bigger sewing needle and the thread from a sewing kit. Depending on the paper you're using, you might need an awl to poke a hole, but I was able to push the needle through four sheets of paper without a problem. Stitch along the crease to bind the pages together. Now you have a little mini book!


Continue to bind the paper until you have several mini books. I made thirteen of these. 


Step 3: Using the same needle and thread, sew the bindings together, so all of the mini books are attached into one book.


This is what it will look like when all sewn together. It's not the prettiest binding, but it does the job. I now have a 104 page book! 


This project took approximately an hour and forty-five minutes, blogging time included. It's a fun little activity for a rainy day. It's a nice gift as a journal, or as a scrapbook. Convenient, as mine is made of scrapbook paper!